Draw an Easter Chick
Learn how to draw an adorable Easter chick in a few easy steps.
Total: $0.00
Here's a fun art activity for kids that you can do during moments of quiet play this Easter Holidays.
Get your supplies!
You will need:
Essential Pencils - HB
Standard Oil Pastels
Stay Anywhere Permanent Pens

Step 1: Draw two circles!
Using a graphite pencil (which you can draw over later) lightly trace two circles, one round, one slightly oval, to make the body and head of the chick. Add a small triangle with a line underneath to make feet. Draw an off-centre cross to the left of the head. Image you have turned an Easter-egg on its side and are drawing an Easter cross through it.
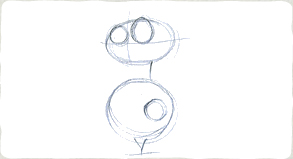
Step 2: Draw three circles!
Use the cross from step 1 to position the eyes. Sketch a small circle on either side of the cross, and another small circle where you want to position the wing.
Step 3: Join the shapes up!
With firm, curved lines, join the shapes together by following the guidelines from the previous steps to make one solid shape for the chick's body. Use your pencil to define the eyes, wings and to draw in an oval for the beak.
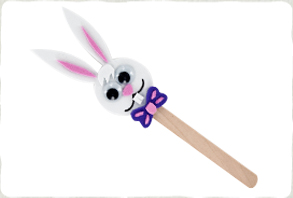
Step 4: Put a smile on its face and colour it in!
Use a pencil to give your chick a smiling beak, happy raised eyebrows, black dots for its eyeballs and little feet. Your chick is done! Now just colour it in using your choice of oil pastels.
false